Tuesday, December 7, 2021

Here comes the payoff!

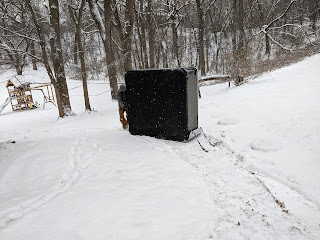
The finally came and the hot tub was delivered!  It came on a big flatbed trunk, I bet they had 2 others on there for deliveries.  The guys that brought it were really good and they had it in place and hooked up in about an hour and a half.  They brought it down the hill on a sled, since it was snowing and cold on Tuesday.

Overall it went in really well, Brian suggested filling it with hot water since it was about 5 degrees out.  He thought it would help thaw it out and make sure it would work.  This is a little in contrast to what they said at Valley, since they suggested using hard water.  But given the situation it seemed wise.


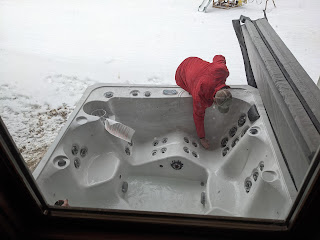
Our directions were to fill it up ad turn on the power and it would know what to do.  However, when we turned on the power all that happened was the pumps hummed...  Yikes!

So we left it for awhile, then tried it again.  Nothing, so I called Brian since I had his number.  He suggested putting a space heater in the cavity of the hot tub, so I ran to target and did that.  I also called our sales person freaking out, so she had her service person call me.  He also suggested a space heater and said he would come out in the morning.  No one seemed too concerned so we tried to calm down.

The next morning (Wednesday), Eric stopped by and really put the space heater in the cavity and closed it up.  I had left the corner cracked because I didn't want it to get too hot or press against any plastic parts.  But that basically did nothing.  Eric said it could take days for the pumps to thaw out.  Fortunately, it didn't take that long.

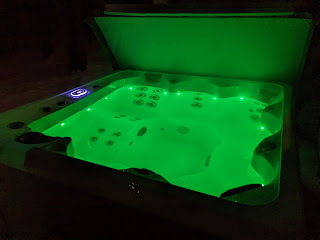
Jen tried the pumps a couple time during the day, then I did when I got home from work.  Nothing.  Then on a whim I tried it at about 6pm, and pump 1 turned on and the heater started working (heater can only run if a pump it running).  A couple hours later pump 2 had thawed as well.  The temp raised in the hot tub about 3 degrees an hour, so by bedtime it was a balmy 55 degrees.

By 4am the next morning the temp was 100 degrees (I happened to wake up and check Sense and it was not running so I was worried the breaker had tripped or something, but it was just done heating :) ).


Wednesday, December 1, 2021

Running Electric for the Hot Tub

 Once the pad was complete for the hot tub I started thinking about the electric.  Initially I was unable to find the spa panel that is required between 5 and 10 feet from the hot tub.  So I contacted the electrician that Christi at Valley Pool and Spa had recommended.  Tyler stopped by and I walked him through what I was thinking.

There are a couple issues with my setup, so Tyler offered to do it as a cash job.

  1. My outside outlet and light out the basement door will be too close to the hot tub (has to be 5 or 10 feet away)
  2. The subpanel in my basement is 60 amps, and the hot tub could pull 50 amps, so he said it might be under powered.  I will be fine, but an inspector might question it.  Mostly what the subpanel supplies is LED lights so it shouldn't be a problem.
  3. I was planning to put the disconnect (spa panel) on the right side of the door and run the conduit over to the other side.  He suggested having it come out under the window on the left side.  In the summer it will be hidden by our Hosta in the winter who cares.
I said OK lets do it, so he said he would get back to me with a quote.  $1600 was the quote.  That seemed high to me, but what could I do.

2 weeks go by and I haven't heard from Tyler, I also notice that Menards has spa panels in stock now.  So I go pick up the needed materials, about $500 (the 6 gauge copper wire was $300 by itself!).

So I put it in myself took a couple hours of wrestling with that big cable, but it is ready.


Saturday, October 30, 2021

Stamped Concrete Pad for a Hot Tub

We have been talking about getting a hot tub for awhile now.  The first step for us is creating a place to put it.  We have a nice spot under our front porch, but it is just gravel with a stoop at the moment.  I have been looking into concrete stamps for awhile and thought it would be fun project to try.

Here we are getting the area ready, Nick tied all the rebar he was a big helper there.  I had to run to Menards, because I had gotten the incorrect bracket to attach my float to my handle.  After hauling all 80 bags of concrete down our hill, I was pretty tired already.  Jen did move some bags down the hill as well, but she was recovering from a cold and dog sitting.

Maddie was a big help throughout the day too, she would fill my bucket with water (Nick did this as well), while the mixer was running and I was moving concrete around.  Originally I though I would have to get all the concrete down quickly, otherwise it would dry.  But it was a cool day fortunately, because it took probably 3 hours to get all the concrete mixed and in the forms!  We used 73 bags on concrete which took 15 pours with the mixer.

Here we have all the concrete in the forms and leveled out.  I had a hard time with the big float, I found it easier to use the hand floats to level stuff out.  I think I need more practice with the big one.  We started with the stamps in the back pretty quick, since it had been sitting there for a couple hours.  They worked pretty well.  It was getting late as we made our way to the front and the concrete was still a little wet, so I had Maddie do the stomping for a lighter touch.

It turned out pretty well for a first attempt.  I think there was too much float water when I was stamping in places, because the release agent stuck around more then I thought it would.  The concrete is supposed to be nutmeg, with hints of grey, but there is a lot of grey in there.  Oh well.  Also there are a couple low spots, but fortunately it is under our front porch, so there shouldn't be too much rain on it.  Not sure if it will be warm enough for me to seal it this fall anymore, so I hope that doesn't cause problems.  Hopefully we can find a hot tub now!

Costs:
Concrete: 73 bags @ $2.35 ($171.55)
Rebar: 12 sections @ $5.68 ($68.16)
Truck rental: $24.50
Concrete Mixer: $81.82
Expansion Joint: 4 @ $2.87
Rebar ties: $4
Rebar chairs 19: $5
Release Agent: $102 (half)
Concrete Hardener: $55 (half)
 = ~$524

Amortized costs for this project:
Mag Bull Float: $99
Float Poles: 2@$18
Float Bracket: $25
Masonry Brush: $8
Loop twister: $5
Stamps: $616
 = ~$793


Saturday, October 23, 2021

What a day up North!

 Today was an interesting day...

We came up North to close up the cabin, pull in the pontoon and dock, and pick up leaves.  First off I pulled the pontoon out of the water, which is a bit hairy since we use the neighbors "ramp" which is in pretty rough shape, but it came out without a problem.  Then I went into town and picked up the oil ($7 qt) and filter ($14 on sale) for the pontoon motor.

While I was working on the boats and motors Jen, Jo, and the kids started working on the leaves.  We use the 4 wheeler to pull a trailer wherever we need it and then empty it up in the woods.  This was all going well, until I pull the wheeler up and the shift rod lever broke.  Ugh, at least it was stuck in 1st gear so I was still able to pull it around.  But then I had to start planning to take it into town.

That brings us to today, we woke up and I went to move the van out of the way and discovered the tire was flat!  I started to put on the spare and thought I would turn on the radio while I worked and managed to lock the key in the car with the radio playing!

We finally got to use our AAA membership, which worked really well and they were there and had the car open in about 45 minutes.  Super happy about that!

I called Fleet Farm and they said they were booked, but they would try to fit me in.  Which they did.  On my way to Fleet I took the 4 wheeler and dropped it off at Maximum Motorsports, they seemed really helpful so hopefully that goes well, we will see next week.

So all in all a couple bumps in the road, but so far it has all worked out.  We had to spend one more night then planned, but small price to pay.  Hopefully shutting down goes well tomorrow.


Saturday, October 9, 2021

Ski rack

 We have been trying to come up with a way to store the water ski's in the basement, up till now they have just been leaning against the wall.  We used these brackets for some shelves upstairs and really liked them, so we thought we would give them a try in the basement and I am super pumped with how they turned out.


Saturday, October 2, 2021

Replacing our other Arc Fault Breaker

Our home was build in 2008, so we only have 2 arc fault breakers that supply the bedrooms.  I replaced our master bedroom breaker in January since we were having trouble with it tripping with our projector.

Then this summer Nick built a computer and it was tripping the breaker for the kids rooms.  So he ran an extension cord from the laundry room and that has been that for a couple months.

I finally got around to buying a new breaker for the kids room and put that in today.  Now I just need him to clean up the extension cord and hopefully everything will work fine!

Update as of 12/1/2021 everything is working well.  No more trips.

Sunday, September 19, 2021

RO Water Filter

 Jen has been wanted an RO filter for awhile.  We have some trace amounts to arsenic and other stuff in the water so she thinks it would be a good idea.

I purchased the system about 6 months ago, so it is probably time to install it :)

I choose to install it in the basement and not under the sink for ease of access and to be able to continue to use the area under the sink to store way too much stuff.

The system we got had pretty good directions and overall the system was pretty easy to install.  It takes a very long time for the water to filter, which is why you get the pressure tank.

We went with the 6 stage filter with the alkaline replacement filter at the end.  I had to buy a longer water line to get up to the sink on the first floor.  Not looking forward to filter replacements.

The water tastes fine, Jen seems happy.  The place I noticed the biggest difference was with the ice cubes, they come out much more clear.  We had a soap dispenser in the hole that we repurposed, so I kind of miss that.  Perhaps it is time to try drilling a hole in granite :)


Tuesday, June 15, 2021

Brake Pad says what!

 The brake pads on the van were making a lovely grinding sound, so I ordered up some new ones.  I decided not to replace the rotors since we are planning to purchase a new van sometime in the not too distant future.

I always have to re-remember how to do it and watch a video but it went pretty well.  Nick helped out on the second one.  Van seems to still stop and the grinding is gone, so success!


It is pretty amazing how much of the pads we used, probably should have gotten to it earlier, but the grinding has only been going on for a week or so.  Not sure why 1 pad still had more wear left on it.


Wednesday, June 2, 2021

Cabin Weekend

 We came back from the cabin last night, we put all the lifts and boats in and I was able to finish up the bathroom project.  Hinges on cabinets are hard...  Especially when retrofitting.  We used Discovery+ instead of the dish while we were up there.  We just need to figure out how to get the local channels and Jo could cancel her dish network.


Monday, May 24, 2021

Hot Day, Put up the Pool!

I put the pool up on Saturday (by myself! no mean task).  Then we filled the pool Saturday and Sunday.  It actually filled up pretty fast in my opinion.  We probably just let it fill longer than in the past (we like to give the well pump breaks).  Then today we went out and picked up the sand and muriatic acid.

It is just starting to take on that brown color, tomorrow morning it will look really disgusting.  But in a week or so it will hopefully be crystal clear.  Chemistry it amazing!


Sunday, May 23, 2021

Nicks Birthday Computer

 All Nick wanted for his birthday was a new computer.  Since the newest computer in our house is from 2013 I think it is probably time.  He is doing some amazing things on there and it would help him out to have a little more power.

Luckily Jen cousin was around to lend a hand, since I haven't built a computer in a long time.  Still pretty much the same, but reassuring to have more eyes on the process.

Everything went well and Nick is happy with the new blazing performance.  No GPU's to be had at this time, so we had to go with integrated graphics for now.  But still a massive upgrade!


Saturday, May 15, 2021

A Water Softener for the house

 We have been in our house for 12 years now.  We really like our water, but we get a build up of calcium around the faucets and on the showers.  We also occasionally get some iron in our water, and when you open up the pipes it is very evident that some iron settles in there.  So we thought we would give a softener a try and see what happens.

The installation when pretty smooth, just followed the directions.  I also had to replumb the kitchen sink, since that line came from the left side of where the softener was going.  You can see the new 1/2 line going up right after the softened water comes out.


We also installed the shut off valve on the left there so I had to cut into that line as well since I wanted the shutoff to be upstream of the outside faucets.


The drains from the softener I wanted to keep out of the way, so I join them with the 3/4 inch pvc and run them to the drain (it is the same material as from the furnace).

We have had it running for about a week now and we are pretty pleased with it.  The phone app seems to work pretty well, though it is pretty spartan.  I wish you could see more history on it.  Dishes seem easier to clean and the taste isn't too bad, but we are going to get a RO system which my wife has wanted for a long time.


Friday, May 14, 2021

Mulch for the back garden

Thursday and Friday we spent tilling and putting down mulch in the back garden area.  It really cleaned it up!  It looks so nice now.

It took 2 loads in the trailer (1 yard) for $47 a load.  We were able to get it from the place just up the road, which was the first time we have used them.  They were very helpful.


Sunday, April 25, 2021

Cabin Bathroom Remodel ++

 On Sunday we finished most of the remove work.  The floor is done (except for some final caulking), the sink is in (except for the water lines, since the ones I had were too short), the toilet is working, still need to finish the cabinet door, and the electric heat is back up (after a little tingle, I really wish all electricity came through the switch first).

We reused the medicine cabinet, but I did something pretty cool.  I opened up the wall and recessed it.  This will give us a little more head space above the sink.  We all took the opportunity to sign the back of the wall of course.

Fortunately, the drywall behind there is covered in paneling as some of the nails pulled through when I cut out the stud.  Overall I am pretty happy with how it turned out.  We are excited to get back up and finish off the few final remaining parts of it and get to work on the next project!


Sunday, April 18, 2021

Cabin Bathroom Remodel +

 Now that the demo is done, Jen started painting the walls.  We went with a darker color which was controversal, but it turned out really sharp.  The drywall had been up for a long time and soaked up a lot of paint, which made the first coat challenging.  But once the first one was up the second went quicker.


While Jen worked on that I tried the old spray painter that Greg had in the basement.  It didn't work as well as I had hoped.  Paint came out and covered the wall, but it kind of made a mess too.


Once that was done I worked on building some shelves for the room as well.  Since we don't know what we want to do with the floor yet and I want to keep as much off the floor as possible I went with a hanging design.  I used old wood that had been shelves in other parts of the basement that we had taken done.


Saturday, April 17, 2021

Cabin Bathroom Remodel

 The bathroom at the cabin is in bad need of a redo.  Greg had purchased a new toilet 2 years ago, but we never got around to installing it.  Since Jen and I had appointments for our COVID shot in Brainerd last week we went up early and spent the week working on it.  Here is the before:

It wouldn't have been so bad, but the toilet had a condensation problem and the floor around it was in pretty bad shape.  First we had to pull the baseboard tile off the wall.  It was attached with glue, so it was a combination of prying and using the oscillating tool.  There were some cracked wall tiles, which we were trying to preserve, but they were below where the new tiles would cover so we were OK.

Then we started pulling up the linoleum around the toilet and found that it was glued down plus the floor was in bad shape.


Luckily there is a subfloor that is in pretty good shape, so we started pulling up the floor which took most of a day.


That oscillating tool was the hero of the project for sure!  I used it and the circular saw to cut through the floor and pull it out in chunks.  


Friday, April 2, 2021

Why women keep men around!

This is fine.


Update:

My daughter continued to claim the drain was slow, so I attempted to same maneuver again.  Lo and behold there was at least an equal amount of hair further down in the drain again.  Happy to say it is flowing well now.

Sunday, March 14, 2021

3D Printer Fun

 We recently got back from a trip to Colorado and Arizona.  Before we left I challenged Nick to design a robot dog for Maddie.  I said that I would get them a 3d printer once his design was complete.  Well he whiped out a design in a couple days and we decided to wait till we got back to buy one.

Of course the second we got back they wanted to get it, and we didn't have anything to do so we drove over to Microcenter and picked up a Ender 3D Pro, which Nick had scoped out and I reviewed.  It was very affordable and seemed to be highly regarded.

We put it together this morning in about a hour and a half.  It went together pretty easily and once the bed was leveled it has been happily printing away for awhile now.

Hoping we can get a lot of good use out of it!


Friday, February 12, 2021

Keyboard Replacement

Recently my Father-in-Law passed away.  My Mother-in-Law doesn't have a use for his old computer, so we thought Maddie could use it.  The issue is that the keyboard is in pretty bad shape, some of the keys don't work well and the W key is missing entirly.  So I thought it would be a good time to get Maddie to help me replace the keyboard.  It is pretty amazing how easy it is to purchase a keyboard and install it.  How many computer have gone to the dump because people didn't think to replace it.

The laptop is a Dell Latitude E7450, so we ordered this keyboard from Amazon: https://amzn.to/3aWwKVo

Maddie and I worked together to pull the old one off and install the new one.  Here is a link to the you tube video we followed: https://www.youtube.com/watch?v=yQE-1jy1eB4

The only tricky thing is the that cables on the new keyboard seemed a little long, but we just pushed the battery down on them and it is working well, so they must slide around a little.

Saturday, January 9, 2021

Recumbent Bike Build

 My in-laws are trying to get a bit healthier this year and purchased a bike to with that.  We went up to help them get it out of their trunk and put together.  The thing is a beast, the box says it weighted in at 163 pounds and I believe it.  Jen and I were able to muscle it into the house, then Nick and I were able to work through the 4 steps to put it together.

It went together pretty easily and seem like a sturdy bike.  They purchased it locally, but it is a Spirit XBR55 Recumbent Bike.  They found it for $1350, about 1500 after tax.  We saved them $150 by putting it together for them.

Now the key is for them to use it.  Lets hope so!


Friday, January 8, 2021

A little organization comes into the world

 I forgot to take a before, but the cables coming into the box were long and coiled all over.  The panel was a mess.  I had to go in there to hook up the Ubiquiti router that I recently got to resolve some wifi problems we were having with our home school and work situation.

Once I got in there I realized the panel was a mess, so I went and ordered a little patch panel to help organize it.  At first I wasn't sure how to patch the wires in, but after reviewing the direction I figured it out.  Just match the colors, even though they are not in order.  It is the A style so hopefully that works with your setup, luckily it did for me.

I want to order some of the little black clips so I can attach some of the other things in there a bit better.

The Ubiquiti router I got is working a bit better.  I don't love the app interface that I have had to use though, it is very restricted.


Here is the little patch panel I ordered:


Replacing an Arc Fault Breaker

This is the view I like to see of my circuit panel, all buttoned up and happy.  However, for the last couple weeks one of our arc fault breakers has been tripping quite a bit.  Probably once a day or so.  The kids computers are on this breaker so needless to say it is quite inconvient.

It sounds like breakers do need to be replaced sometimes, so I thought I would just replace the breaker.  Turns out it is a little challenging to find the right breaker.  They don't make it the easiest.  But I was able to find a suitable replacmeent at Menards ($36, ugh so much more than regular breakers) and was able to pick it up on the bag sale, which was nice.

It always feels dicey to me to put my hand in the panel, but I was able to get the old one out and put in the new one.  Didn't realize for an arc fault you need to attach it to the neutral bar, as well as the neutral line for the circuit.

So we will see what happens now, I am hoping to not have to deal with it anymore.  Or at least for another 10 years.

We have not had any issues in the last 10 days, so that is a definite improvement.