Showing posts with label heating. Show all posts

Monday, December 26, 2022

Garage Heater part duex


I built a thermostat to control the heater.  I have a little server running on NAS that it uploads temp/humidity data to and will update the setpoint when it sends data (once a minute).  I don't have it running all the time, only when we are out there and need it.  It was a fun little project.

I will eventually get around to adding graphs, but for now it will cycle the heater on and off as needed to maintain setpoint.


Sunday, November 13, 2022

Garage Heater

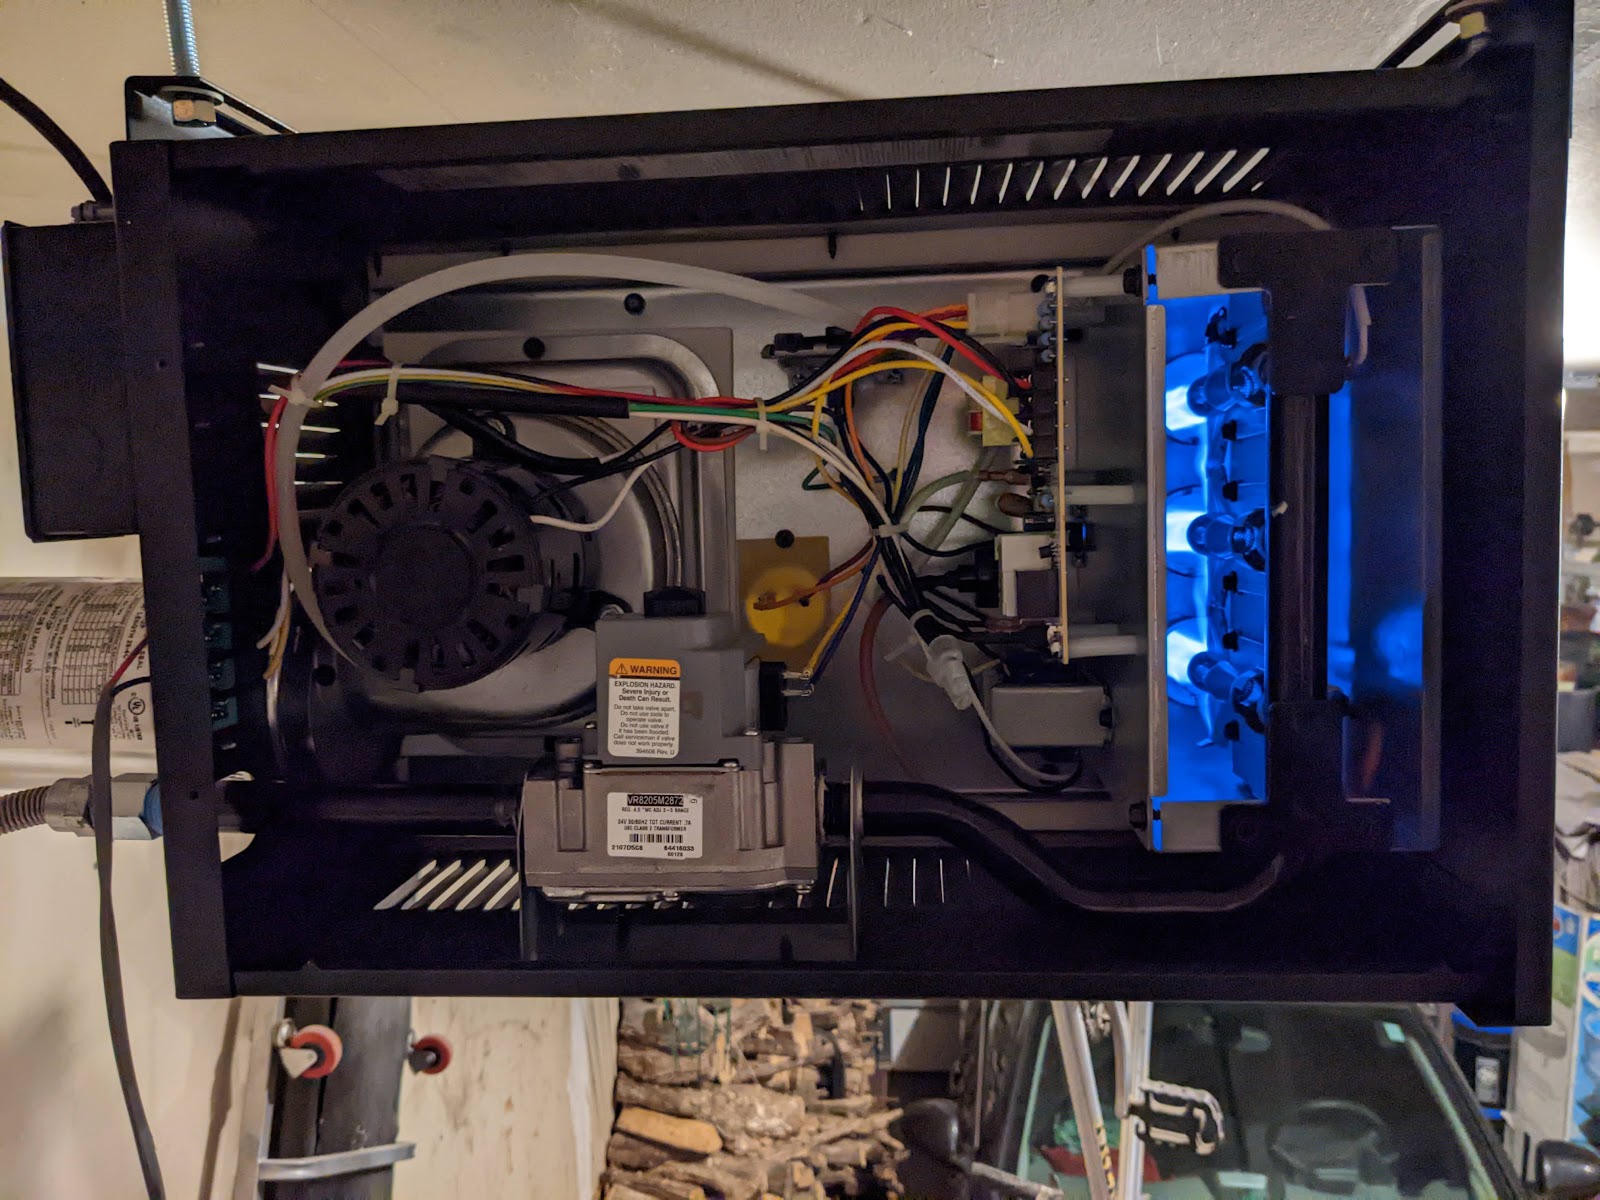
 I installed a garage heater this weekend.  I have had it for about a year and finally got around to installing it.  I think it will be pretty nice to heat up the garage to work out there.  We aren't going to heat it all the time, that would be pretty wasteful, just when we are out there.

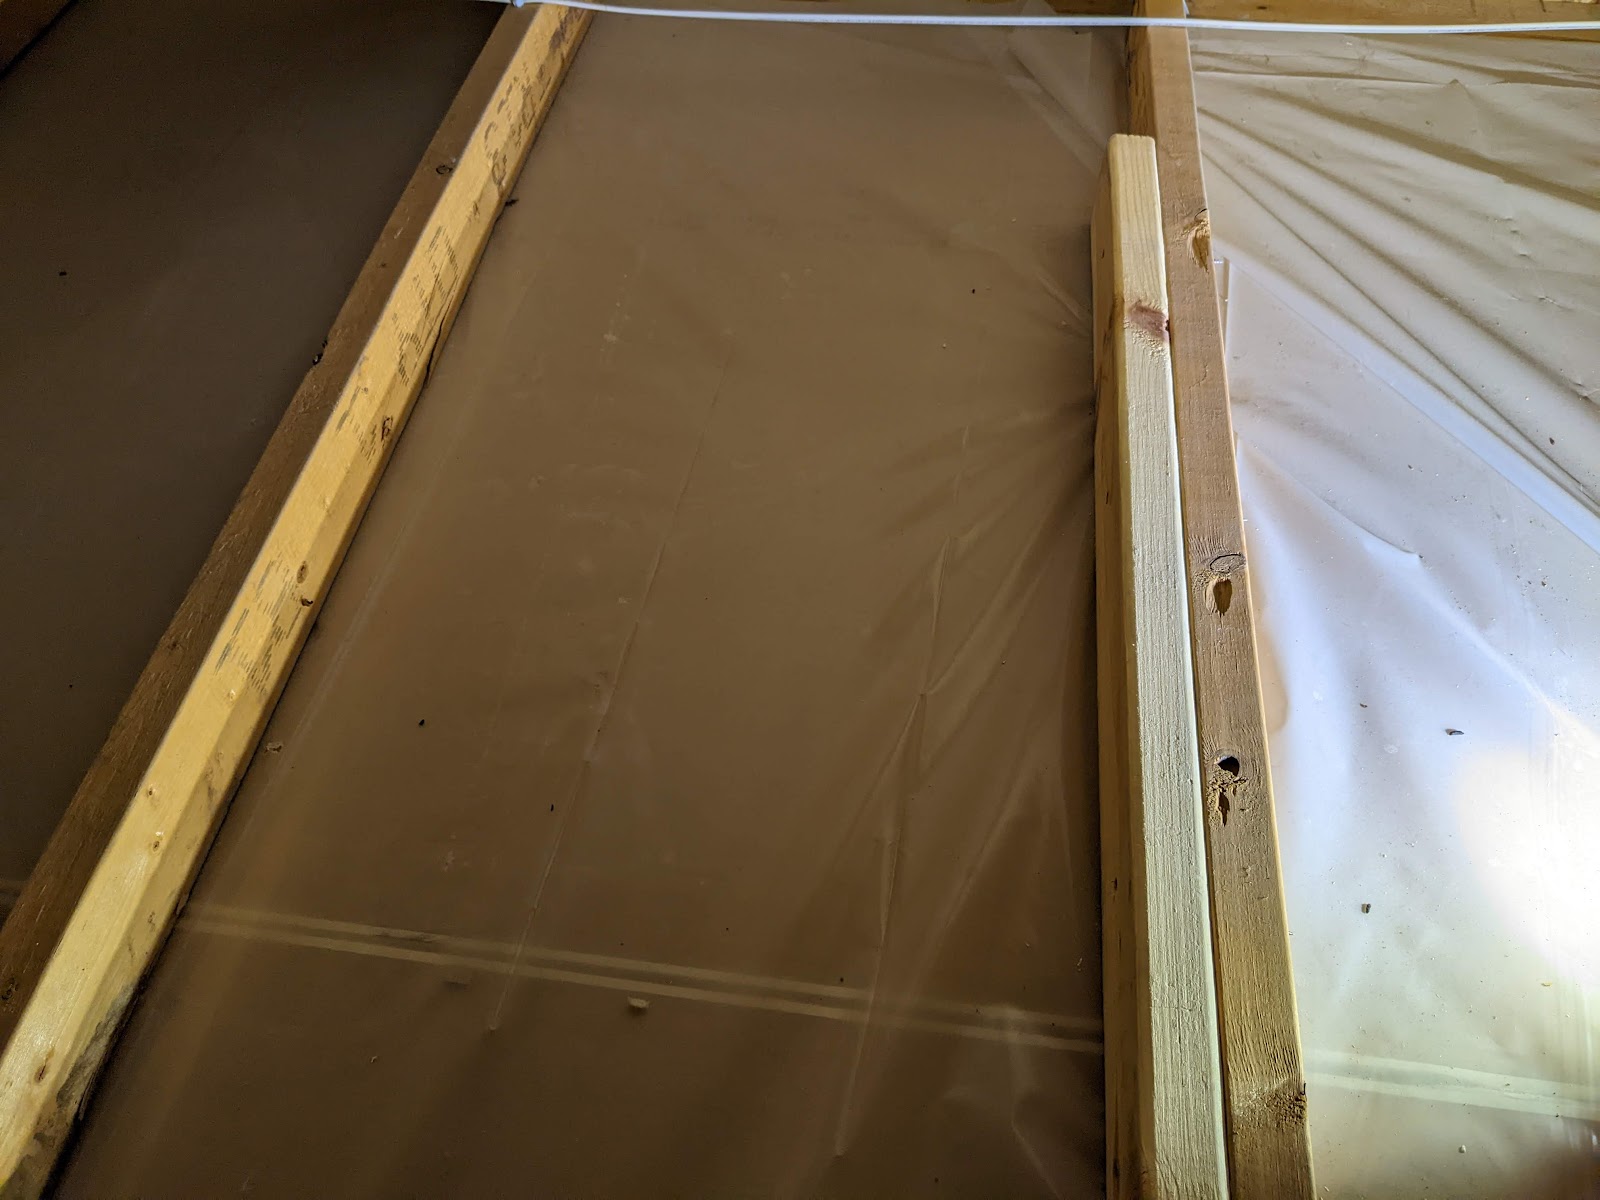
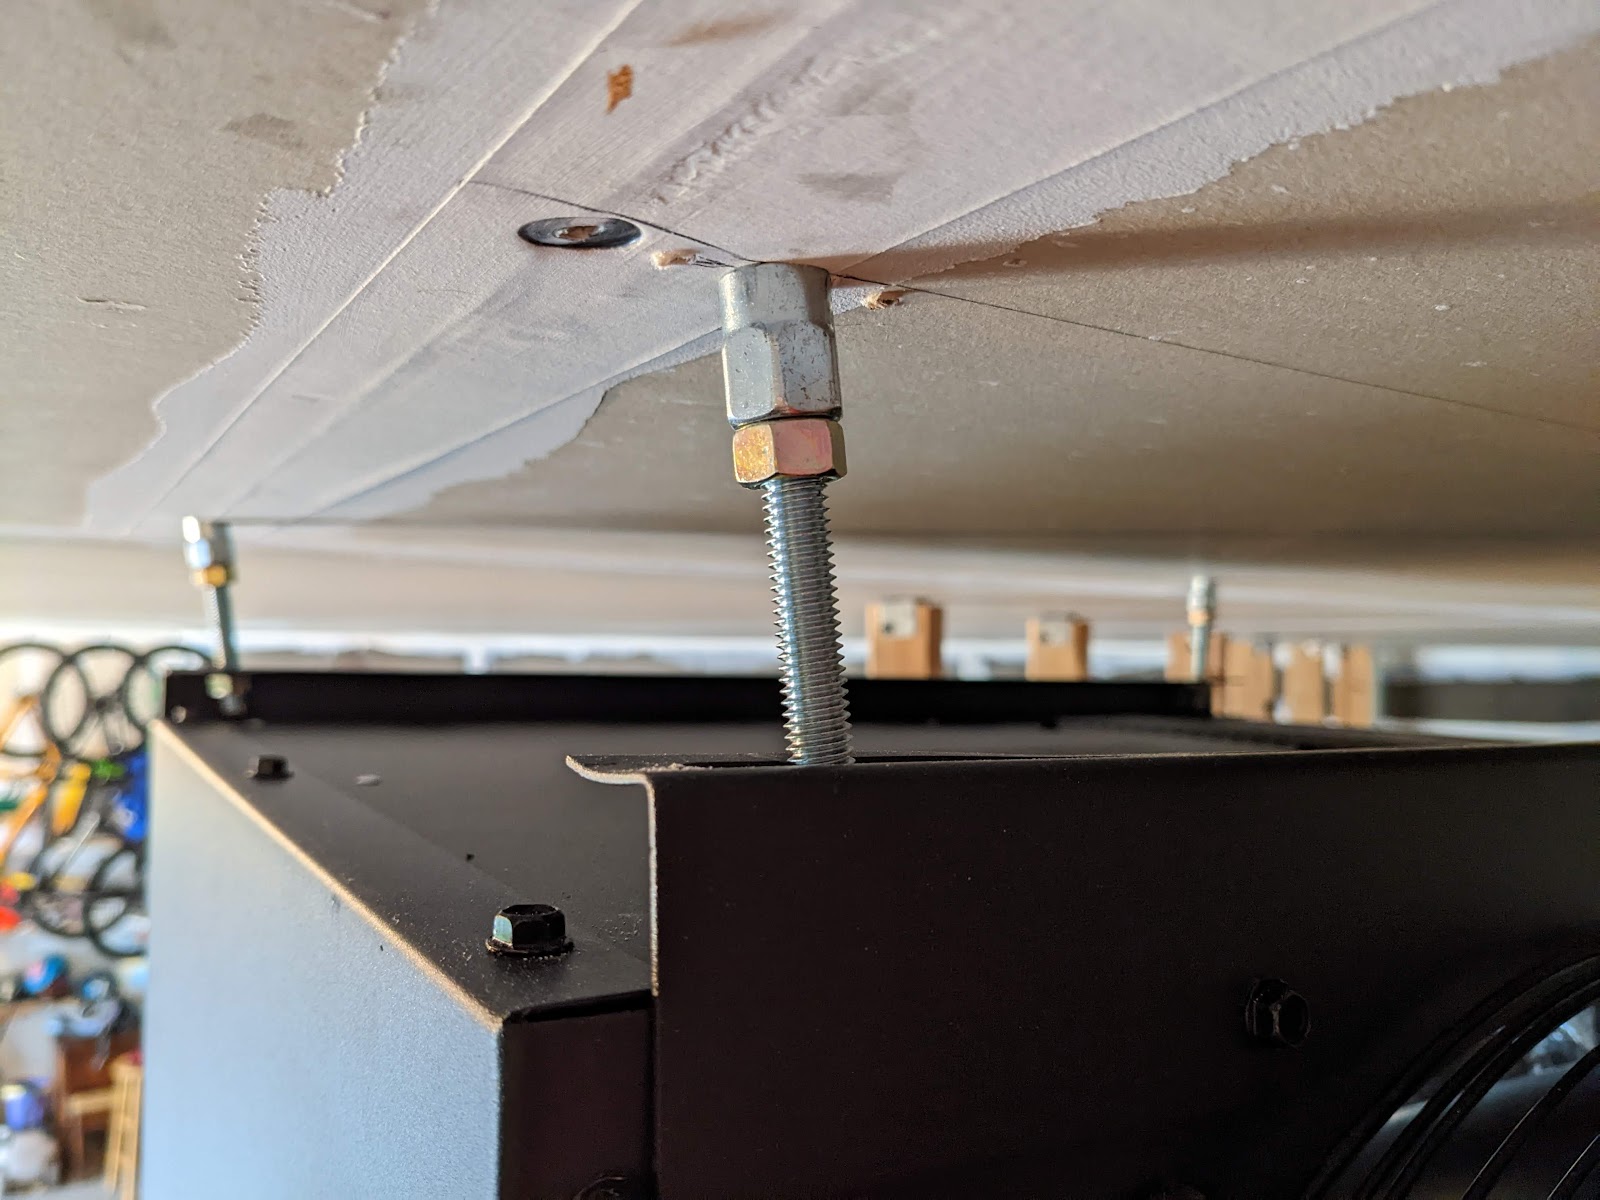
The first issue I ran into was that the heater is a little more narrow then the 24 inch rafters in the ceiling.  so I just screwed a 2x4 into it and screwed into that.


I used these thread hanging screws that worked OK, probably should have just used angle iron like everyone else does.  Trying to muscle the heater onto the posts was a challenge.  I wish I would have had a drywall lift.  You can see the rods were able to move around a bit which allowed it to work.  The fit was quite tight.


It feels very secure and doesn't move around at all, so I am pretty confident in the threaded rods.  Once it was up, I had to figure out where the exhaust would go.  I used a carpentry square to figure out where to make the hole in the wall.


Always the scariest part, putting a hole in an exterior wall.  I used a rotozip tool, which made quick work of making the hole in the drywall.  I used an ocsillating tool on the vinyl outside, since I had a block with j-channel built in.  Getting the siding off so I could slide the j-channel in was a challenge in the cool weather.

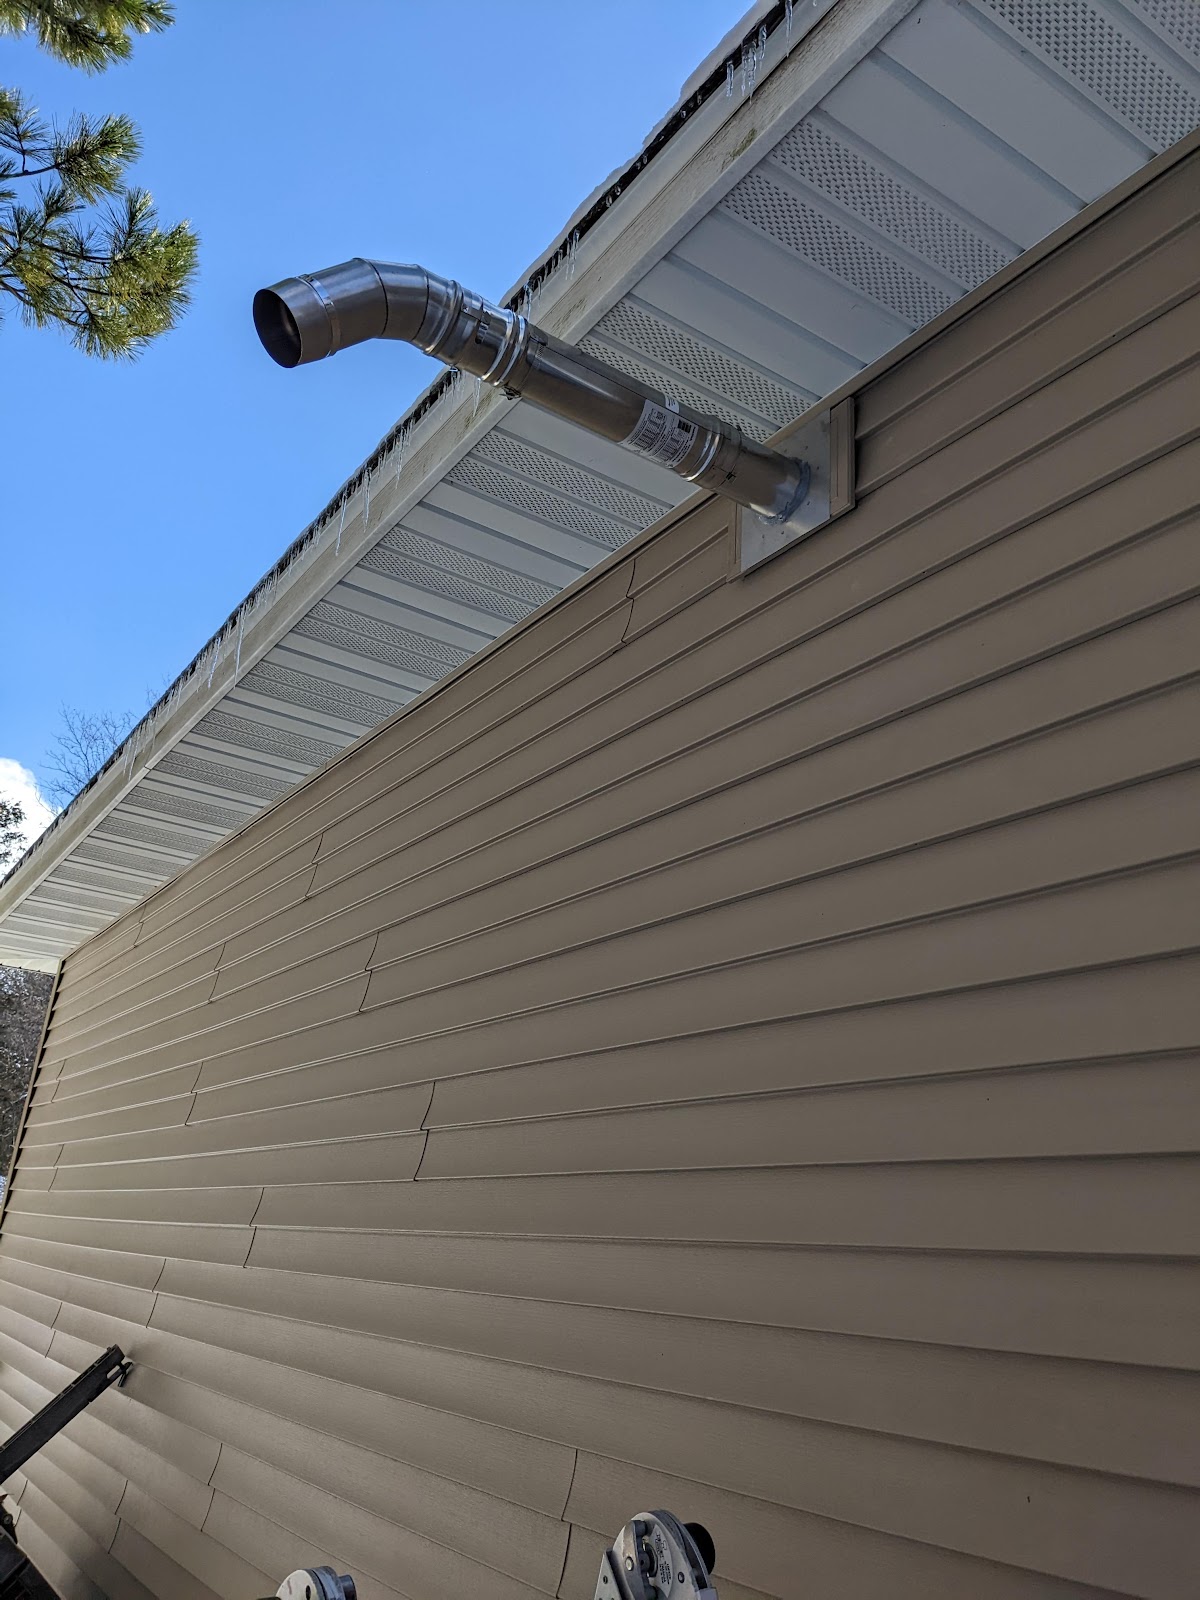
I originally just had the exhaust blowing out pretty close to the soffit.  But thought better of it and added another 19 inches of length, I don't think it will hurt anything there.  It is supposed to be 4 feet out, but that would be really far out!  Since we aren't running it all the time, I am OK with where it is at.


Here it is running.  I am working on making a thermostat, and I need to put in an outlet to plug it into.  I am also dealing with a small gas leak.  I had a bigger leak, but it turned out that I needed to use pipe dope instead of tape on the connector hose, they need to seat all the way into tube.  I think the new little leak is at the test port, I tested the pressure 7.8 inches into the value and 4 inches going into the manifold.


Saturday, May 28, 2022

New Life for the Water Heater

When we came up earlier this year we had to hot water, so we had to boil water on the stove to do dishes.  Not ideal!  I was thinking I was going to have to put in a new water heater, but I stopped by Appliance Depot and he recommended that I just check out the connections with a multimeter first.

Once I started doing a little reading I realized it might not be so bad.  The first thing I measured was the voltage at the heating element.  That is the bottom part with 2 wires going to it.  It measured 240V, so I knew the breaker was fine.

Then I shut off the breaker and did a continuity check, which resulted in no continuity.  I checked the bottom element as well and there was continuity there.  So I determined that the heating element needed to be replaced.


I could buy 1 heating element for $20 or a pack with 2 plus the thermostat for $25.  So I went with the later.


They normally have a 1.5 inch water heater heating element wrench that you can buy for $7, however they were out of them at the time.  So I went with $65 dollars worth of a socket and breaker bar.  I don't feel too bad about returning them after I used them, and I will pick up the $7 wrench when they are back in stock as it seems like something useful to have around with my spare heating element.
 

Here you can see the old heating element.  Not sure what happened to it, but it no longer has continuity.  Also interesting that it was a lot shorted then the new ones.  Same wattage though, which appears to be the important part.


Overall a simple fix and a big relief.  I wonder if I need to check the sacrificial rod in the water heater and if that could have caused the issue with the heating element.  I will have to read into that.

Friday, November 13, 2020

Furnace Install

 My installation date is Friday the 13th :)  Good thing I am not superstitious.

2 man crew arrived at 8am, and finished about 11am.  They said they would be done by lunch and they were done by lunch.  The new unit slipped right in place of the old unit.  It is a little smaller actually so they had to add an air flow box underneath.  Which I guess helps with the air flow anyway, because they are building furnaces so small now that there isn't enough space for the return air to enter anyways.

They pulled my A-coil out and I was a bit concerned to see all the rust on there.  I guess that is pretty typical though.  Something about how they don't build them like they used to.

Here is the new one, you can see the airflow box underneath.  I need to clean up the humidifier tubing and wiring.  We hooked up the 2nd stage of heat to the nest, though I can't really tell much of a difference in the fan speed between stage 1 and 2, apparently you can tinker with the CFM setting for the fan, but I haven't gotten there yet.

When I just run the fan it is very quite though.  I think it runs at about 30% of full, which is very quite and uses about 200 watts instead of 600 to 800.  So I might consider leaving it running, but I have never really needed it.


Wednesday, November 4, 2020

New Furnace Time

 My furnace has been leaking water out the bottom for awhile.  I looked at it and it appeared to be coming from the heat exchanger, so eventually I thought I would have someone come look at it.  I chose to go with the company that installed it, since I didn't want to get a fly by night low cost to inspect an arm and a leg to fix.

It was a Trane XR90, 92% efficient furnace.  It went in with the house in 2009.  Chuck came and assessed the situation and determined it was in fact the heat exchanger was no longer sealed.  The furnace has a 20 year warranty on the heat exchanger, so I was able to get the part for free, but the labor to replace it was going to be about $1000 he thought...

So I inquired about a new furnace, he recommended a Trane S9V2 which is 96% efficient with 2 stages of heat for $5500.  There are some rebates involved and my Trane discount which knock it down another $825.  So I went with that option just so I don't have to worry about it or deal with more parts failing.

I also asked for the Heat Exchanger as that is an expensive part, and I figured they owed me that and I might be able to sell it.  I also called around and received a lower bid, which they agreed to match ($5080).


Thursday, October 30, 2008

Insulation


The insulators stopped by yesterday and did spray foam in the joist area. This is the area above the front door. I would have liked them to spray foam the entire house, but apparently that costs like 12,000 more then what we are doing.

Thursday, October 23, 2008

Solar Heating

I received an email from a Dan Agosto yesterday and he happened across my blog and wanted to see if we were interested in a product he sells, that would provide solar heating. I don't think we are interested in it at this point, but I thought I would post a link to his site in case someone else was: US Solar Heating